Can I Learn Pottery At Home?
By Linda · · 8 min read
Yes, you can absolutely learn pottery at home. You don’t need a wheel or a kiln to start. A 25 lb bag of clay, a few basic hand tools, and a table you can wipe down are enough to learn hand-building, which is where I tell every beginner to begin. The wheel, the kiln, and the glazes can all come later, once you know you love it.
The honest caveat: finished, food-safe ceramics require firing in a kiln at 1,800–2,400°F (982–1,316°C), and most people don’t own one. The good news is you don’t have to. Community studios, kiln-share services, and local potters will fire your work for a few dollars per piece while you learn.
What You Really Need to Start (and What You Don’t)
A genuine beginner setup is cheaper than most people expect:
- Clay: a 25 lb bag of mid-fire stoneware (cone 5–6) runs roughly $15–$30 from a pottery supplier. Stoneware is forgiving and widely accepted by studios that fire outside work.
- Basic tools: a needle tool, wire cutter, wooden rib, metal rib, sponge, and a loop trimming tool. A beginner tool kit costs about $10–$20.
- A work surface: a piece of canvas, a smooth wooden board, or a drywall scrap so clay doesn’t stick to your table.
- A water bucket and old towels. That’s it.
What you do not need on day one: a pottery wheel ($200–$1,500+), a kiln ($600–$3,000+), or a shelf full of glazes. I’ve watched too many beginners spend $2,000 on equipment before they’ve made ten pots. Make things first, buy gear second.
You also don’t need a specialty store for everything. A hardware store like Home Depot covers the generic supplies (buckets, sponges, canvas drop cloths, plaster for making molds, wire shelving for drying pots). But the clay, glazes, and tools themselves should come from a ceramic supplier, since hardware-store materials aren’t formulated for firing.
Three Ways to Make Pottery at Home
There are three main techniques, and they have very different startup costs and learning curves:
| Method | Startup cost | Learning curve | Best for |
|---|---|---|---|
| Hand-building (pinch, coil, slab) | $30–$60 | Gentle. Usable pieces in your first session | Beginners, small spaces, kids |
| Wheel throwing | $300–$1,500+ | Steep. Centering alone takes weeks of practice | People committed to the craft |
| Slip casting | $100–$300 | Moderate. Mold-making is the hard part | Repeating identical forms |
Hand-building is the right entry point for almost everyone. Pinch pots teach you how clay feels at different moistures, coil building teaches joining and scoring, and slab work teaches structure. Every one of those skills transfers directly to the wheel later. I cover the full step-by-step process in my guide on how to make pottery at home.
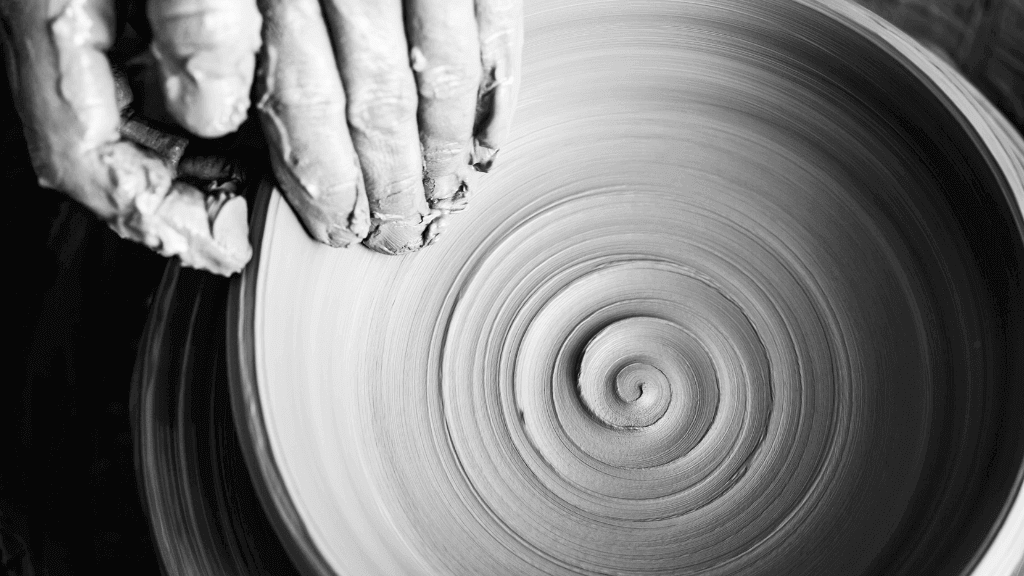
If you’re set on the wheel, expect the first several hours to be humbling. Centering clay is the gatekeeper skill, and most people need 10–20 hours of practice before it feels reliable. A used wheel in good condition is a smart first purchase; entry-level new wheels start around $250–$500.
A Realistic Learning Path
Here’s the sequence I recommend, because it front-loads cheap skills and delays expensive purchases:
- Weeks 1–4: Hand-build with stoneware. Make pinch pots, a coil mug, a slab tray. Let pieces dry slowly under loose plastic. Drying takes about a week for most pieces, and rushing it causes cracks.
- Weeks 4–8: Find a firing source (see below) and get your first pieces bisque fired. Seeing your work survive the kiln teaches you more about wall thickness and joins than any video.
- Months 2–4: Learn glazing on your bisqueware. Start with two or three commercial glazes, not twelve.
- Month 4+: Decide whether you want a wheel, a kiln, or neither. By then you’ll know.
For a deeper version of this roadmap, see how to start pottery at home.
Glazing Pottery at Home
Yes, you can glaze at home even if you can’t fire at home. The workflow most home potters use: bisque fire elsewhere, bring the pieces home, glaze them at your kitchen table, then return them for the glaze firing.
A few rules that prevent most beginner glaze disasters:
- Match your glaze to your clay’s cone. A cone 6 glaze on cone 6 clay. Mismatched cones cause crazing, shivering, or glaze that runs off the pot.
- Wax or wipe the bottom. Glaze melts to glass in the kiln, and a glazed foot will weld your pot to the kiln shelf. Leave the bottom quarter inch bare.
- Three coats, dried between coats, is the standard for brushing commercial glazes. Thin glaze looks washed out; gloppy glaze runs.
- Stir constantly. Glaze materials settle fast, and the good stuff sinks to the bottom of the jar.
Pint jars of commercial brushing glaze run roughly $10–$25 each. I walk through the whole process (tools, application methods, and common defects) in how to glaze pottery at home. And if you’re wondering about skipping the kiln entirely, read can you glaze pottery without a kiln first. Paints and sealers can make decorative pieces, but nothing food-safe.
How Do You Fire Pottery Without Owning a Kiln?
This is the question that stops most people, and it shouldn’t. Your options, roughly in order of how often I recommend them:
- Community studios and art centers. Many fire outside work for $3–$10 per piece or by the kiln-shelf inch. Call ahead and ask what clay bodies they accept.
- Kiln-share directories. Sites like Kiln Share connect you with local kiln owners who fire for a fee.
- Local schools and colleges. Continuing-education ceramics classes often include firing, so one class fee buys you instruction and kiln access.
- Paint-your-own-pottery shops. Some will fire greenware or bisque for hobbyists if you ask nicely.
- Pit firing or raku at home. Real techniques, but they produce porous, decorative ware, not dinnerware. My guide to firing pottery without a kiln covers what’s realistic.
If you eventually buy your own, a small 120V test kiln starts around $600–$900 and runs on a standard outlet; full-size kilns need a 240V circuit and typically cost $1,200–$3,000 new.
Common Beginner Problems (and Fixes)
- Cracking during drying. Usually uneven thickness or fast drying. Keep walls consistent and dry pieces slowly under loose plastic.
- Pieces falling apart at the joins. You skipped scoring and slipping. Scratch both surfaces, add slip, press firmly.
- Clay too wet or too dry to work. Wedge stiff clay with a damp sponge; let sticky clay sit uncovered for an hour.
- Can’t center on the wheel. Everyone struggles here. Use less water, brace your elbows against your body, and use 1–1.5 lbs of clay, not 3.
- S-cracks in wheel-thrown bottoms. Compress the floor of your pot with a rib before pulling walls.
Safety at Home
Pottery is safe at home if you control dust. The real hazard isn’t the clay in your hands. It’s dried clay dust (silica), which you should never sweep dry.
- Wet-mop or sponge your workspace; never sweep or dry-vacuum clay dust with a regular vacuum.
- Wear a NIOSH-rated respirator (N95 minimum, P100 for mixing) when handling dry clay or powdered glaze materials.
- Keep glazes away from food prep, label everything, and wash hands before eating.
- If you’re glazing around kids or pets, stick to glazes labeled non-toxic and lead-free.
Clay is also drying on the skin. If that bothers you, see my notes on whether pottery makes your hands rough.
Learning Resources and Community
You’ll learn faster with feedback. YouTube is genuinely excellent for pottery, since watching someone’s hands is most of the lesson. Structured courses on platforms like Skillshare and Udemy add progression. Ceramic Arts Network publishes free downloadable guides and hosts an active community of potters at every level.
That said, nothing accelerates a beginner like one in-person class. Even a single 6-week wheel course at a community studio compresses months of solo trial and error, and it gets you kiln access. My post on how to get into pottery covers how to find and choose one.
FAQ
Can you do pottery at home without a kiln?
Yes. You can do every step at home (building, trimming, glazing) and pay a local studio or kiln-share to fire your pieces for a few dollars each. Air-dry clay is another option for purely decorative work, though it’s never food-safe or waterproof.
How do I start making pottery at home as a complete beginner?
Buy a bag of cone 5–6 stoneware and a $15 tool kit, and start with pinch pots and slab building on a canvas-covered table. Find a firing source before your pieces are bone dry so you know what clay they accept. Total startup cost is usually under $60.
Is making ceramics at home expensive?
Hand-building costs $30–$60 to start, plus $3–$10 per piece for firing. The hobby only gets expensive if you buy a wheel ($250–$1,500) or a kiln ($600–$3,000), and you can put both off for months or skip them entirely.
Can I glaze ceramics at home?
Yes, as long as the piece has been bisque fired first. Brush on three coats of a commercial glaze matched to your clay’s cone, keep the bottom bare, and send it back for a glaze firing at roughly 2,165–2,232°F (1,185–1,222°C) for cone 5–6.
How long does it take to learn pottery?
You can hand-build a usable pinch pot on day one. Wheel throwing takes most people 10–20 hours of practice just to center reliably, and a few months of regular practice to throw consistent mugs and bowls. It’s a skill of repetition — twenty mediocre cylinders teach more than one precious pot.
Do I need a pottery wheel to make pottery at home?
No. Hand-building (pinch, coil, and slab techniques) produces everything from mugs to large planters with no wheel at all, and it’s how potters worked for thousands of years. Buy a wheel only after a few months of hand-building tells you you want one.