Can You Make Pottery At Home?
By Linda · · 8 min read
Yes, you can make pottery at home. Handbuilding techniques like pinch pots, coil pots, and slab building need nothing more than a bag of clay, a few simple tools, and a table — no wheel and no kiln required to start. If you want fired, food-safe ceramics, you’ll eventually need kiln access, but you can rent kiln space at a local studio rather than buying one.
A basic home setup costs roughly $50–$150 if you handbuild with air-dry clay or rent kiln time. Add a wheel ($150–$1,000+) and a small kiln ($600–$3,000) only when you know you’ll stick with it.
What You Need to Make Pottery at Home
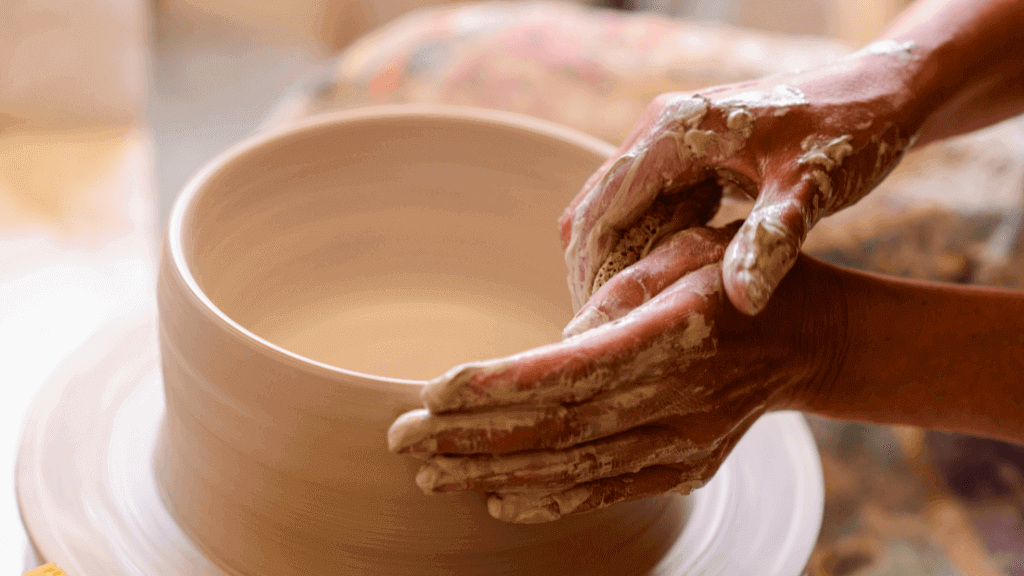
Here’s the realistic starter list. You don’t need everything on day one. Clay and your hands come first.
- Clay. A 25 lb bag of mid-fire stoneware runs about $15–$30 from a clay supplier. For no-kiln work, air-dry clay costs $10–$20 for a 5–10 lb tub.
- Basic tools. A wire cutter, wooden rib, metal scraper, needle tool, and sponge. A beginner tool kit is usually $10–$25.
- A work surface. A piece of canvas or a smooth board so clay doesn’t stick to the table.
- Water bucket and slip cup. Slip (clay mixed with water) is your glue for joining pieces.
- A wheel (optional). Only needed if you want to throw. You can make pottery without a wheel for years using handbuilding alone.
- Kiln access (eventually). Many studios fire outside work for a per-piece or per-shelf fee, often $10–$40 per kiln load share.
If you’re starting completely from scratch, I walk through the full setup process in my guide on how to start pottery at home.
How to Make Pottery at Home: The Basic Steps
The process is the same whether you’re handbuilding on the kitchen table or throwing in a garage studio.
- Wedge the clay. Knead it like bread dough for a few minutes to remove air bubbles. Trapped air can crack or even pop a piece in the kiln.
- Shape the piece. Pinch, coil, slab, or throw. Keep walls a consistent thickness. About 1/4 inch (6 mm) is a good target for beginners.
- Let it dry slowly. Cover loosely with plastic and let it dry over several days to a week until bone dry. Rushing this stage is the number one cause of cracks. See my post on how long pottery takes to dry for timing details.
- Bisque fire. The first firing, usually to cone 04 (about 1,945°F / 1,063°C), hardens the clay so it can be glazed. It takes roughly 8–10 hours plus cooling time.
- Glaze. Brush, dip, or pour glaze onto the bisqueware, keeping the bottom clean so it doesn’t fuse to the kiln shelf.
- Glaze fire. The second firing, typically cone 6 (about 2,232°F / 1,222°C) for mid-fire stoneware, melts the glaze into a glassy surface. Allow another 10–12 hours plus a day of cooling.
From wedging to finished pot, expect two to four weeks. Most of that is drying and waiting for kiln loads. The hands-on time for a simple piece might only be a few hours.
Do You Need a Kiln? Your Firing Options at Home
A kiln is the biggest obstacle for home potters, but you have more options than you might think.
| Option | Cost | Food safe? | Best for |
|---|---|---|---|
| Rent kiln space at a studio | $10–$40 per load share | Yes | Most home potters |
| Buy a small electric kiln | $600–$3,000 | Yes | Committed hobbyists |
| Air-dry clay (no firing) | $10–$20 per tub | No | Decorative pieces, kids, trying it out |
| Pit or barrel firing | Cheap but smoky | Generally no | Outdoor, experimental work |
| Oven-bake polymer clay | $2–$4 per 2 oz block | No (decorative only) | Jewelry, small figures |
A home oven can’t fire real pottery. It tops out around 500°F (260°C), and clay needs to reach at least 1,800°F (982°C) to vitrify. I cover the alternatives in detail in how to fire pottery without a kiln.
If you do buy a kiln, a small 120V model plugs into a standard outlet; anything bigger needs a 240V circuit and clearance from anything flammable. Fire it in a garage or outbuilding with ventilation, never in living space.
Can You Make Pottery Clay at Home?
You can, and people have for thousands of years. Natural clay is common in stream banks, road cuts, and subsoil. Look for dirt that turns slick and sticky when wet.
Here’s the basic process for processing dug clay:
- Test the soil. Wet a handful and roll it into a coil around your finger. If it bends without cracking, there’s workable clay in it.
- Dry and crush it. Spread the soil out, let it dry completely, then break it into powder.
- Slake it in water. Mix the powder with plenty of water into a thin slurry and let it sit a day.
- Screen it. Pour the slurry through a window screen or fine mesh to remove rocks, roots, and sand.
- Settle and dewater. Let the clay settle, pour off the clear water, then spread the slip on a plaster slab or thick fabric until it stiffens to a workable consistency.
- Wedge and test fire. Wild clay varies wildly, so fire a small test piece before committing a whole project to it.
It’s a satisfying weekend project, but honestly, commercial clay at roughly $1 per pound is hard to beat for consistency. If you want to try it, read my full post on using clay from the ground for pottery first. It covers testing shrinkage and firing temperature so your pieces don’t crack or melt.
Pottery vs. Ceramics: Is There a Difference at Home?
For practical purposes, no. “Ceramics” is the broader term for anything made from fired clay: pottery, tile, sculpture, porcelain figurines. “Pottery” traditionally means vessels: bowls, mugs, vases, plates. If you can make pottery at home, you can make ceramics at home; the materials, tools, and firing process are identical.
The person doing the making is called a potter, or more broadly a ceramicist (also spelled ceramist). “Ceramic artist” usually implies sculptural or fine-art work, while “potter” leans toward functional ware. Use whichever you like. Nobody at the clay store will correct you.
Setting Up a Safe Home Pottery Space
Clay is safe to work with, but dry clay dust contains silica, and breathing it over years can damage your lungs. A few habits keep a home studio safe:
- Clean with water, never a dry broom or regular vacuum. Wet-mop or sponge surfaces so dust never goes airborne.
- Wear an N95 or better respirator when mixing dry clay or glaze powders.
- Keep clay work out of the kitchen if you can, and never let glaze materials near food prep surfaces.
- Wash work clothes separately and rinse clay down a sink trap or settling bucket, not straight down the drain. Clay will clog plumbing.
- Ventilate the kiln area. Firing releases fumes, so kilns belong in garages or outdoors under cover, with a downdraft vent if indoors.
Your hands will take some wear from clay and water; pottery can dry out your skin, which I cover in does pottery make your hands rough.
What Linda Recommends for Your First Month
Skip the wheel and the kiln entirely at first. Buy one bag of stoneware or a tub of air-dry clay, a $15 tool kit, and make pinch pots and slab dishes on your kitchen table for a few weeks. You’ll learn how clay moves, dries, and cracks, all for under $50.
If you’re still hooked after a month, find a studio that fires outside work, switch to real stoneware, and start glazing. That’s the point where it’s worth deciding whether to learn pottery at home with online classes or join a community studio for hands-on feedback. Buy equipment last, not first.
FAQ
Can you make pottery at home without a kiln?
Yes. Use air-dry clay for decorative pieces, or shape real clay at home and rent kiln space at a local studio for firing. You only need your own kiln if you’re producing a lot of work.
How do you make pottery clay at home?
Dig clay-rich soil, dry and crush it, slake it in water, screen out debris, let it settle, and dry the slip to a workable consistency on plaster or fabric. Always test fire a small sample first, since wild clay matures at unpredictable temperatures.
What are people who make pottery called?
Someone who makes pottery is called a potter. The broader term is ceramicist (or ceramist), which covers anyone working in fired clay, including sculptors and tile makers.
Is making pottery at home expensive?
Starting with handbuilding costs $30–$50 for clay and tools. A full setup with a used wheel and small kiln typically runs $1,000–$3,000, which is why I recommend renting kiln space until you’re sure you’ll stick with it.
Can you fire pottery in a regular oven?
No. Home ovens reach about 500°F (260°C), while clay needs at least 1,800°F (982°C) to become true ceramic. Oven-bake polymer clay works in a home oven, but it’s plastic-based and decorative only, not food-safe pottery.
How long does it take to make a piece of pottery at home?
Plan on two to four weeks from raw clay to finished, glazed pot. Shaping might take an hour, but drying takes several days to a week, and each of the two firings needs roughly 8–12 hours plus a full day of cooling.