How To Get into Pottery
By Linda · · 8 min read
The easiest way to get into pottery is to take a beginner wheel or hand-building class at a local studio. A beginner course usually runs 4–8 weeks and costs roughly $150–$400, with clay, tools, and kiln firing included. You learn the fundamentals with an instructor watching your hands, and you don’t have to buy a single piece of equipment before you know whether you love it.
If classes aren’t available near you, start with hand-building at home. A 25 lb bag of clay costs about $15–$30, basic tools another $20–$40, and many local studios will fire your pieces for a small per-piece or per-shelf fee.
Start with a Class Before You Buy Anything
I tell every beginner the same thing: don’t buy a wheel or a kiln first. Take a class.
A studio class gives you access to thousands of dollars of equipment for the price of a course fee. You’ll find out quickly whether you prefer wheel throwing or hand-building, and you’ll skip the most common beginner mistake: spending $1,000+ on gear for a hobby you haven’t tried yet.
Look for:
- Community studios and art centers. Multi-week beginner courses, often with open studio hours included.
- Community college continuing-education classes. Frequently the cheapest option per hour of instruction.
- One-off “try it” workshops. A 2–3 hour taster session, usually $40–$80, perfect if you just want to touch clay once before committing.
- Paint-your-own-pottery shops. These are glazing studios, not pottery-making studios. Fun, but they won’t teach you to work with raw clay.
Class prices vary a lot by city, so check what pottery classes cost in your area before assuming it’s out of budget. Small-town art centers are often half the price of big-city studios.
What to Expect at Your First Pottery Class
Knowing what’s coming makes the first session far less intimidating:
- Wear old clothes and short nails. Clay stains and splatters, and long nails gouge the clay (you can work around them, but it’s harder).
- You’ll learn wedging first. That’s kneading the clay to remove air bubbles and even out the moisture.
- On the wheel, centering comes before everything. Expect to spend most of your first two or three sessions just learning to center a lump of clay. Everyone struggles with this. It’s normal.
- Your first pieces will be heavy, wobbly, and small. That’s not failure. That’s week one.
- You won’t take anything home for 2–4 weeks. Pieces must dry slowly, be bisque fired, glazed, and glaze fired before they’re done.
The biggest predictor of success isn’t talent — it’s showing up to practice between sessions. Studios with open studio hours are worth the extra cost for exactly that reason.
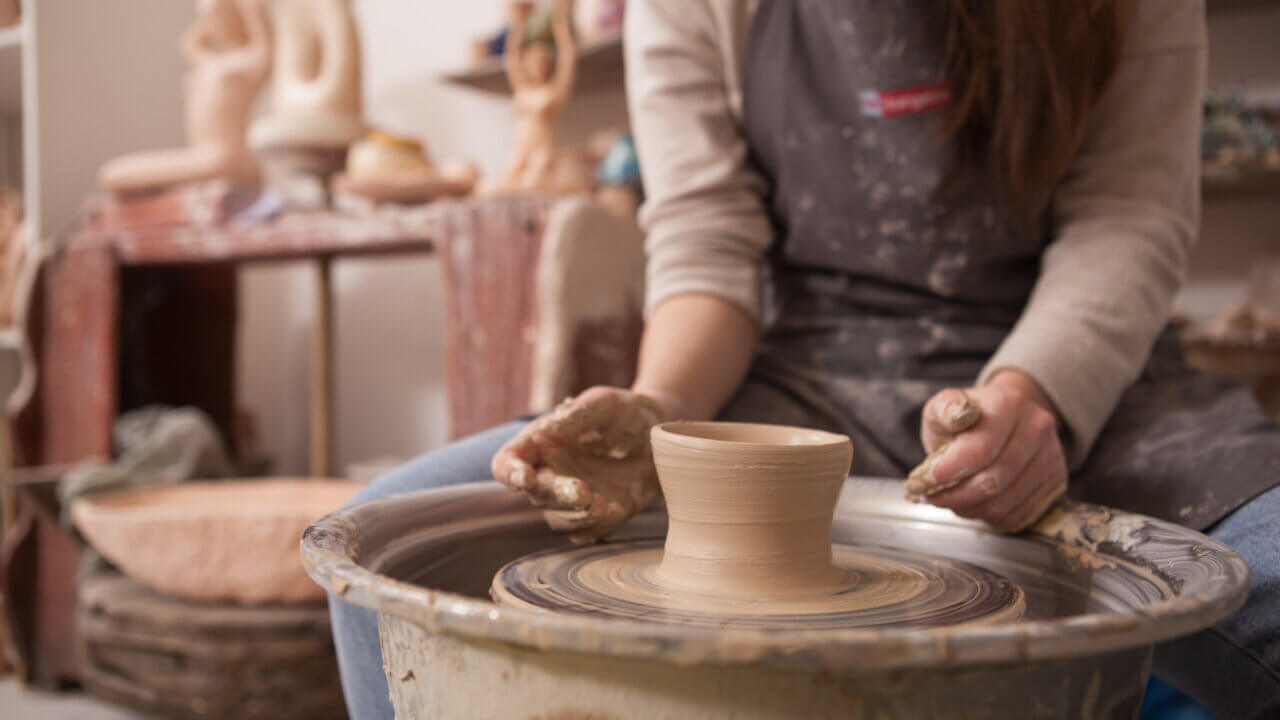
Hand-Building vs. Wheel Throwing: Pick Your Starting Point
You do not need a wheel to make pottery. Hand-building (pinching, coiling, and slab work) is how people made pots for thousands of years, and it’s the cheaper, more forgiving entry point. You can make pottery without a wheel indefinitely; plenty of professional ceramic artists never throw at all.
| Hand-building | Wheel throwing | |
|---|---|---|
| Startup cost | $40–$80 (clay + basic tools) | $300–$1,500+ for a wheel, plus tools |
| Learning curve | Gentle. Usable pieces in your first session | Steep. Weeks just to center reliably |
| Space needed | A sturdy table | Dedicated corner with power and splash room |
| Best first projects | Pinch pots, coil planters, slab trays | Cylinders, then bowls and mugs |
| Cleanup | Minimal | Significant (splash pan, slurry, floor) |
My honest recommendation: start with hand-building at home while taking a wheel class at a studio. You get the cheap, low-pressure practice of one and the equipment access of the other.
What Pottery Costs to Start (Realistic Numbers)
Pottery has a reputation as an expensive hobby, and the kiln is the reason. Here’s how the budget breaks down:
- Clay: $15–$30 for a 25 lb bag. Beginners should use stoneware with some grog. It’s forgiving, and fired to maturity with a food-safe glaze it makes durable functional ware.
- Basic tool kit: $15–$40 for a wire cutter, wooden rib, metal rib, needle tool, sponge, and trimming loop.
- Beginner class: roughly $150–$400 for a multi-week course, firing included.
- Entry-level electric wheel: roughly $300–$700; mid-range hobby wheels run $700–$1,500. Used wheels can cut that significantly.
- Small electric kiln: roughly $700–$3,000 new, plus the cost of an electrician if you need a 240V outlet.
The good news: you can put off the kiln for years. Most studios and some art centers offer firing services, so the real question of whether pottery is an expensive hobby depends almost entirely on whether you rent kiln space or buy your own.
Getting Into Pottery at Home
If there’s no studio within reach, home is a perfectly good place to start. I’ve covered the full setup in my guide to starting pottery at home, but the short version:
- Set up a clay-safe workspace. A sturdy table, a board or canvas work surface, and a floor you can mop. Never wash clay slurry down a household drain, because it sets in pipes. Use a bucket, let the clay settle, and pour off the clear water.
- Buy real pottery clay, not air-dry clay, if you want functional pieces. Air-dry clay is fine for decorative practice but never becomes food-safe or waterproof.
- Learn the three hand-building techniques in order: pinch pots (control), coils (scale), slabs (precision).
- Find a firing solution. Search for “kiln firing services” plus your town. Local studios, schools, and individual potters with kilns often fire outside work for a few dollars per piece.
- Manage drying carefully. Pieces need to dry slowly and evenly to bone dry before firing, and drying usually takes about 1–2 weeks depending on thickness and humidity. Rushing it causes cracks.
For a deeper look at whether self-teaching is realistic (it is, with caveats), see my post on learning pottery at home.
Understand Firing Before You Get Attached to Your Pieces
Raw clay must be fired in a kiln to become ceramic. Two firings are standard:
- Bisque firing hardens bone-dry clay into porous ceramic, typically around cone 06–04 (1,828–1,945°F / 998–1,063°C).
- Glaze firing melts the glaze into a glassy surface. Earthenware glaze-fires around cone 06–04, while stoneware matures around cone 5–6 (2,167–2,232°F / 1,186–1,222°C).
This matters from day one because your clay and glaze must match. A cone 6 stoneware glazed with a low-fire glaze, or vice versa, gives you crawling glaze, weeping pots, or worse. Buy clay and glaze rated for the same cone range and you’ll skip a whole category of beginner heartbreak.
One more thing on glaze: buy commercial glazes labeled food-safe for anything that touches food. Old or imported glazes can contain lead, and lead has no place on a dinner plate.
A kitchen oven cannot fire pottery. It tops out around 500°F (260°C), nowhere near the heat needed to vitrify clay.
A Realistic First-Year Progression
Here’s the path I’d map out for someone starting from zero:
- Months 1–2: Take a beginner course. Make pinch pots and coil pieces at home between sessions.
- Months 3–6: Join open studio hours or a community studio membership. On the wheel, drill cylinders (not bowls, not mugs, just cylinders) until centering feels boring.
- Months 6–12: Start glazing deliberately instead of randomly. Keep a notebook of clay body, glaze, and firing results for every piece; it’s the single habit that separates potters who improve from potters who plateau.
- Year 2 and beyond: Decide whether home equipment makes sense. By now you’ll know what wheel features matter to you and whether a kiln fits your space, wiring, and budget.
Don’t measure progress in finished pieces. Measure it in skills: centering, pulling an even wall, trimming a clean foot, applying glaze evenly.
FAQ: Frequently Asked Questions
How do I get into pottery with no experience?
Book a beginner class or one-off workshop at a local studio. You don’t need experience or equipment; the studio supplies everything. If no studio is nearby, buy a bag of stoneware clay and a basic tool kit (under $60 total) and start with pinch pots and slab building at home, then find a local kiln-firing service for finishing.
Is pottery hard to learn?
Hand-building basics come quickly. Most people make a respectable pinch pot in their first hour. Wheel throwing is harder: expect several weeks of practice before you can center clay consistently, and a few months before your mugs look like mugs. Steady practice matters far more than natural talent.
Do I need a pottery wheel to get started?
No. Pinching, coiling, and slab-building require nothing but clay, a table, and a few inexpensive tools. A wheel is worth considering only after you’ve taken classes and know that throwing is the direction you want to go.
How much does it cost to get into pottery?
A beginner course runs roughly $150–$400 with materials and firing included, which is the cheapest real entry point. Starting hand-building at home costs about $40–$80 in clay and tools. A full home studio with a wheel and small kiln typically lands between $1,500 and $5,000 depending on new versus used equipment.
Can I fire pottery at home without a kiln?
Alternatives exist: pit firing, raku in a small portable kiln, even a charcoal barbecue for primitive low-fire work. But they’re smoky and inconsistent, and they produce porous pottery that isn’t food-safe. For functional pieces, rent kiln space or use a local firing service until owning a kiln makes sense.
How long does it take to learn pottery?
You can hand-build usable pieces within your first few sessions. Reliable wheel skills (centered cylinders, trimmed feet, even glazing) typically take 3–6 months of weekly practice. Developing a personal style is a years-long project, which is most of the fun.