How To Start Pottery at Home
By Linda · · 9 min read
To start pottery at home: 1) Buy 10–25 lbs of stoneware or earthenware clay and a basic hand tool kit. 2) Set up a small workspace with a wipeable surface, water access, and good ventilation. 3) Learn to wedge clay, then practice handbuilding (pinch pots, coils, slabs) before investing in a wheel. 4) Dry your pieces slowly for 1–2 weeks until bone dry. 5) Fire them (rent kiln space at a local studio, or buy a small home kiln later), bisque firing first, then glaze and glaze fire. 6) Join a pottery community online or locally so you can troubleshoot and improve faster.
You do not need a wheel or a kiln on day one. Most potters I know started with a bag of clay, a few wooden tools, and a kitchen table. The expensive equipment came later, once they knew they were hooked. I cover the full beginner path in more detail in my guide on how to get into pottery, but everything below is what you need to start at home this week.
Start With Handbuilding, Not the Wheel
Wheel throwing looks like the heart of pottery, but it has the steepest learning curve and the biggest price tag. Handbuilding teaches you the same clay fundamentals (moisture control, joining, drying) for the cost of a bag of clay.
Three techniques will carry you a long way:
- Pinch pots. Open a ball of clay with your thumb and pinch the walls thin and even. Good for small bowls, and for learning how clay responds to pressure.
- Coil building. Roll ropes of clay and stack them, blending the seams. This is how you build tall vases and planters without a wheel.
- Slab construction. Roll clay flat (a rolling pin and two wooden dowels as thickness guides work fine), cut pieces, and join them with scored edges and slip. Mugs, trays, and boxes all come from slabs.
Spend your first month on these. You can make genuinely good, sellable pottery without a wheel at all. Plenty of professional ceramicists never throw.
Setting Up a Pottery Workspace at Home
You need less space than you think: a sturdy table, a wipeable floor or a tarp, and access to water. A corner of a garage, basement, or spare room works. What matters more than square footage:
Ventilation and Dust Control
Dry clay dust contains silica, which you should not breathe over the long term. The rules are simple: never sweep dry clay dust. Wipe surfaces with a wet sponge and mop floors instead. Work over a canvas or smooth board you can wipe down, and let scraps stay damp until you recycle them. If you eventually add a kiln, it needs real ventilation (a window vent or downdraft system), since firing releases fumes.
Water and Cleanup
Never wash clay-heavy water down your drain. Clay settles and will eventually clog pipes. Keep a bucket of water for rinsing hands and tools, let the clay settle overnight, pour off the clear water, and throw the sludge in the trash (or recycle it back into workable clay).
Storage
Unused clay stays in its plastic bag, twisted shut, inside a lidded bin. Works-in-progress get loosely covered with plastic so they dry slowly. A cheap wire shelf handles both plus your finished bisqueware.
Essential Tools and Materials (and What They Cost)
Here’s a realistic starter budget. Prices vary by region and brand, but these ranges hold up:
| Item | Typical cost | Do you need it on day one? |
|---|---|---|
| Clay (25 lb bag, stoneware) | $15–$40 | Yes |
| Basic hand tool kit (rib, needle, wire, sponge, trimming tools) | $10–$30 | Yes |
| Canvas board or smooth work surface | $10–$25 | Yes |
| Underglazes/glazes (pints, beginner set) | $30–$80 | When you’re ready to fire |
| Tabletop pottery wheel | $150–$500 | No, wait a few months |
| Full-size electric wheel | $400–$1,500+ | No |
| Small home electric kiln | $700–$3,000+ | No, rent kiln space first |
So a true starting kit is roughly $40–$100. The wheel and kiln are the big-ticket items, and both can wait. If you do go shopping for a wheel later, I break down what pottery wheels cost in a separate post. Used wheels are often the smart buy.
Choosing Your First Clay
Clay body matters more than beginners expect, because it determines your firing temperature and how forgiving the clay is in your hands.
| Clay type | Firing range | Best for beginners? |
|---|---|---|
| Earthenware | Cone 06–04 (~1828–1945°F / 998–1063°C) | Yes. Low-fire, cheap, and forgiving |
| Stoneware | Cone 5–10 (~2167–2381°F / 1186–1305°C) | Yes. Durable, food-safe when glazed, and the most common studio clay |
| Porcelain | Cone 8–12 (~2280–2419°F / 1249–1326°C) | No. Beautiful, but it punishes sloppy hands |
My recommendation: start with a mid-fire stoneware with grog (fine sand-like particles). The grog gives the clay tooth, so it holds its shape while you’re learning. Ask your local clay supplier what the nearby studios fire to, since matching their cone temperature matters if you’ll be renting kiln space.
Skip air-dry clay if your goal is real pottery. It’s fine for kids’ projects, but it never becomes waterproof or food-safe, and the skills don’t fully transfer.
Learning the Fundamentals
Wedging
Wedging is kneading clay to remove air bubbles and even out moisture. Air pockets can crack or even blow up a piece in the kiln, so wedge every lump before you build with it. I’ve lost work to a lazy wedging job, and it stings every time. Cut-and-slam or ram’s-head wedging both work; 30–50 repetitions is typical.
Joining (Score and Slip)
Any time two pieces of clay meet (a handle on a mug, a coil on a coil), scratch both surfaces with a needle tool and add slip, which is clay mixed with water to a cream consistency. Press firmly and blend. Skipping this step is the number one cause of handles popping off in the kiln.
Centering and Throwing (When You Get a Wheel)
If you add a wheel later, centering is the skill that takes longest. Expect several weeks of frustrating practice before the clay stops fighting you. Brace your elbows on your body, use slow steady pressure, and keep the clay wet. Once centered, you open the clay, compress the floor, and pull the walls up in two or three slow pulls. My post on making pottery at home walks through the full process step by step.
Drying Your Pottery the Right Way
More beginner pieces die in drying than in firing. Clay shrinks as it dries, and uneven drying means cracks — especially where thick meets thin.
- Cover fresh pieces loosely with plastic and let them stiffen to leather hard (firm but carveable) over 1–3 days. This is when you trim, carve, and attach handles.
- Then let them dry uncovered to bone dry: room temperature to the touch, lighter in color, usually 7–14 days total depending on thickness and humidity.
- Never fire a piece that feels cool against your cheek. That coolness is moisture, and moisture turns to steam in the kiln and cracks or explodes the piece.
I cover timelines and trouble signs in detail in how long pottery takes to dry.
Firing Without Owning a Kiln
This is the question that stops most people, and the answer is: rent kiln space. Most community studios, art centers, and some clay suppliers fire other people’s work for a per-piece or per-shelf fee, often a few dollars per small piece. Search “kiln firing services” plus your city, or call local studios directly.
The standard firing sequence:
- Bisque firing. Bone-dry pieces are fired slowly to around cone 06–04 (~1828–1945°F / 998–1063°C). This hardens the clay but leaves it porous enough to absorb glaze.
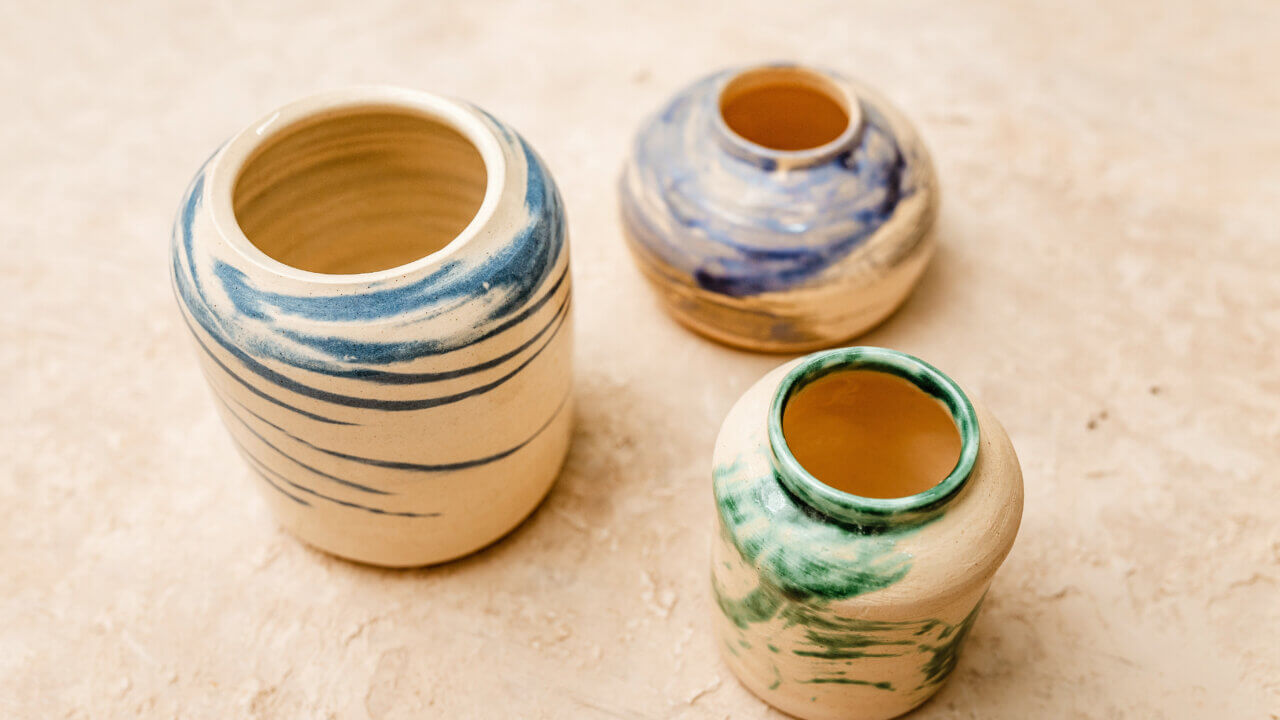
- Glazing. Brush, dip, or pour glaze onto the bisqueware. Wipe the bottom clean so the piece doesn’t fuse to the kiln shelf. For anything that will touch food, use glazes labeled food safe and skip lead glazes entirely; lead can leach into food and drink.
- Glaze firing. Fired to the clay and glaze’s target cone (commonly cone 6, ~2232°F / 1222°C, for mid-fire stoneware). After this, your pottery is finished and, with a food-safe glaze, ready to use.
If there’s truly no kiln access near you, there are workarounds like pit firing, though results are decorative rather than food-safe. I’ve written a full guide on firing pottery without a kiln if you want to try that route. And if you eventually buy your own, a small used electric kiln on a dedicated circuit is the usual entry point. Keep it away from anything flammable, fire when you can check on it, and vent it properly.
Storing and Recycling Clay
Clay is endlessly reusable until it’s fired. Keep unused clay sealed in plastic so it doesn’t dry out. Collect scraps and trimmings in a bucket; when you have enough, let them dry completely, cover with water to slake down, pour off the excess, spread the slurry on a plaster slab or canvas until it stiffens, then wedge it back to working consistency. Free clay, forever.
Connecting With Pottery Communities
Pottery is much easier with feedback. A local studio’s open-studio hours, a community college class, or even one workshop will compress months of solo trial and error into a few sessions. Online, active ceramics forums and video tutorials cover nearly every problem you’ll hit. Whether home learning alone can take you all the way is something I dig into in can I learn pottery at home. Short answer: yes, but firing access and occasional in-person feedback make a huge difference.
FAQ: Starting Pottery at Home
How do I start pottery at home with no experience?
Buy a 10–25 lb bag of stoneware clay and a basic tool kit (under $100 total), clear a table, and start with pinch pots and slab pieces. Follow video tutorials for technique, dry your work for 1–2 weeks, and pay a local studio to fire it. Add a wheel and kiln only after a few months, once you know you’ll stick with it.
Do I need a kiln to start pottery at home?
No. You can learn every forming technique without one, and when pieces are ready to fire, most local studios and art centers rent kiln space for a small fee. A kiln is usually the last purchase a home potter makes, not the first.
Is wheel throwing the only way to make pottery?
No. Pinching, coiling, and slab building produce everything from mugs to large vases with no wheel at all. Handbuilding is also the cheaper and easier place to start. Most potters add the wheel later.
How much does it cost to start pottery at home?
Roughly $40–$100 for clay, basic tools, and a work surface, plus modest firing fees at a local studio. A tabletop wheel adds $150–$500, a full-size wheel $400–$1,500+, and a small home kiln $700–$3,000+. All of those are optional in your first year.
How do I decide which type of clay to use?
For most beginners, a mid-fire stoneware with grog is the clay I’d hand you: it’s forgiving to work with, and it’s food-safe once glazed properly. Earthenware is a good low-fire alternative; save porcelain until your skills are solid. Match your clay’s cone rating to whatever kiln you’ll be firing in.
Is it safe for kids to start pottery at home?
Yes, with supervision. Handbuilding with regular or air-dry clay is very kid-friendly. The main rules: keep dust down (wet cleanup only), wash hands afterward, and keep children away from kilns and glaze materials, some of which shouldn’t be handled or inhaled.