How To Glaze Pottery at Home
By Linda · · 9 min read
To glaze pottery at home, start with clean, dust-free bisqueware, mix your glaze to the consistency of heavy cream, then apply it by brushing, dipping, or pouring. Wipe the glaze off the bottom of the piece, let it dry completely, and fire it in a kiln to the temperature your glaze and clay require. For low-fire glazes that’s usually cone 06–04 (1828–1945°F / 998–1063°C); for mid-fire, cone 5–6 (2167–2232°F / 1186–1222°C).
The full process takes a few hours of hands-on work plus a firing cycle of roughly 8–12 hours and an equally long cool-down. Below I’ll walk through each step, the application methods, what the firing involves, and what to do if you don’t own a kiln.
What You Need to Glaze Pottery at Home
You don’t need a studio full of equipment, but a few basics make the job far easier:
- Bisque-fired pottery. Glaze goes on bisqueware, not raw (greenware) clay.
- Glaze. Commercial pint jars of brushing glaze generally run about $10–$25 each; dry glaze you mix yourself is cheaper per piece. I cover pricing in more detail in how much pottery glazes cost.
- Soft glaze brushes (a hake or fan brush works well), a clean damp sponge, and a bucket of water.
- Wax resist (optional but helpful) for keeping glaze off the foot of the pot.
- A kiln, or access to one. Many local studios and ceramic shops fire pieces for a per-piece or per-shelf fee.
- Safety gear. Gloves, and a properly rated respirator if you mix dry glaze powders.
Step-by-Step: Glazing Ceramics at Home
Here is the sequence I follow on every piece:
- Confirm the piece is bisque fired. Glazing greenware almost always ends badly. The raw clay absorbs too much water and can crack or collapse.
- Clean the bisqueware. Wipe with a barely damp sponge to remove dust. Skip this and the glaze can crawl or flake off.
- Wax the bottom. Brush wax resist on the foot, or plan to sponge the glaze off later. Glaze on the base will weld your pot to the kiln shelf. I explain why in can you glaze the bottom of pottery.
- Mix the glaze thoroughly. Stir until it’s smooth and the texture of heavy cream, with no settled sludge at the bottom of the jar.
- Apply the glaze. Brush 2–3 even coats (letting each dry until it loses its shine), or dip the piece for a count of about 3 seconds.
- Tidy up. Sponge any glaze off the foot and smooth out drips or bare spots with a fingertip dab of glaze.
- Dry completely. Usually an hour or two; the surface should be powdery-dry to the touch.
- Fire to the glaze’s rated cone. Check the label. Firing a cone 06 glaze to cone 6 melts it into a runny mess, and the reverse leaves it dry and underfired.
Choosing the Right Glaze
The single most important rule for finished glazed pottery: match the glaze’s firing range to your clay body. A low-fire (cone 06–04) glaze on a stoneware clay fired to cone 6 will run, blister, or fail. The clay bag and the glaze label both list a cone range, and those ranges need to overlap.
Commercial brushing glazes are the easiest starting point at home. They’re pre-mixed, gummed for brushability, and the jar usually shows a fired sample tile. If a jar has been sitting in your garage for years, give it a hard stir and a test fire first. I cover what to look for in does pottery glaze expire.
If you plan to make mugs, bowls, or anything that touches food, use a glaze labeled food safe and lead-free, and fire it to its full rated temperature.
Prepare Your Bisqueware
Before glazing, make sure your bisqueware is clean and dust-free. Wipe each piece with a damp sponge, but don’t soak it; too much moisture keeps glaze from adhering well. Let a sponged piece sit 15–30 minutes before glazing so the surface absorbs glaze evenly.
Handle cleaned bisque by the foot where you can. Oils from your hands can make the glaze crawl away from fingerprints during firing.
Mixing Glaze Properly
Mix your glaze to a thick, smooth consistency similar to heavy cream. Glaze materials settle fast, so stir again every few minutes while you work; uneven suspension is the most common cause of streaky, patchy results.
For powdered glazes, mix outdoors or under ventilation and wear a respirator. Silica dust is the real hazard in a home glazing setup. Once the powder is wet, the dust risk drops, but keep glazes off your skin and definitely away from kids and pets. Glaze splashes are also stubborn on fabric (does pottery glaze stain clothes).
Glaze Application Methods Compared
| Method | Best for | Coats needed | Drawbacks |
|---|---|---|---|
| Brushing | Beginners, detail work, small batches | 2–3 | Brush marks if rushed; slowest method |
| Dipping | Even coverage, batches of pieces | 1 dip (~3 sec) | Needs a large bucket of glaze (often 1–2 gallons) |
| Pouring | Insides of mugs, vases, large pieces | 1 pour | Drips and overlap lines take practice |
| Spraying | Smooth gradients, blending colors | Several light passes | Requires spray gun, booth, and respirator |
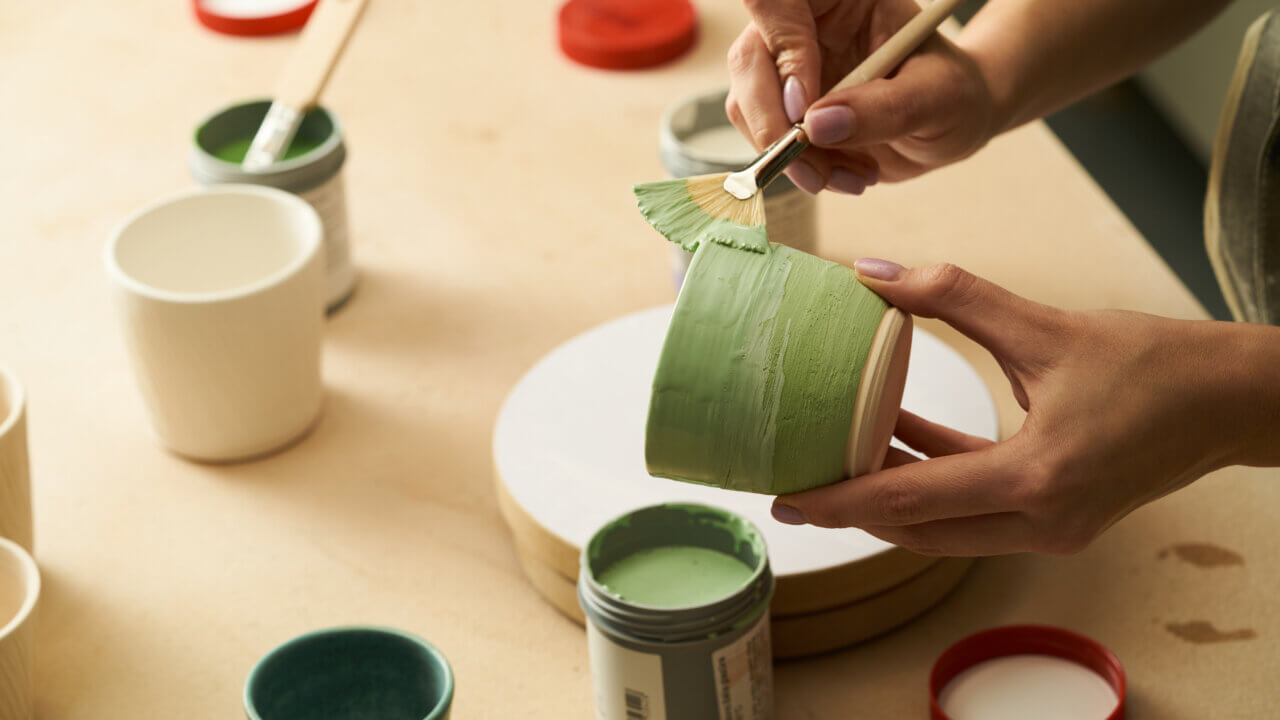
Brushing
Brushing is the most practical method at home. Load a soft brush generously and work in overlapping bands. Let each coat dry until it loses its wet shine (10–20 minutes) before the next. Most brushing glazes want 2–3 coats for full color.
Dipping
Dipping gives the most even coat in the least time. Hold the piece with dipping tongs or your fingertips, immerse it smoothly for about 3 seconds, pull it out, and shake off the excess. The catch is volume: you need enough glaze to submerge the piece, which usually means buying or mixing it by the gallon.
Pouring
Pouring is the standard way to glaze the inside of a mug or vase: pour glaze in, roll it around to coat the walls, and pour it back out in one steady motion. It pairs well with dipping or brushing the outside.
Spraying
Spraying produces beautifully even, blended surfaces but needs a spray setup, ventilation, and a respirator. I’d skip it until brushing and dipping feel routine.
Firing Glazed Pottery: Temperatures and Schedule
Let glazed pottery dry completely before loading the kiln. Wipe or stilt the bottoms so no glaze touches the shelf, and leave at least a quarter inch between pieces. Glazed pots must never touch each other, because the glaze becomes liquid glass at peak temperature.
Typical home firing ranges:
- Low-fire glaze (cone 06–04): 1828–1945°F (998–1063°C). Most beginner and hobby glazes live here.
- Mid-fire glaze (cone 5–6): 2167–2232°F (1186–1222°C). Durable, and common for functional stoneware.
- High-fire glaze (cone 9–10): about 2300–2345°F (1260–1285°C). Mostly studio and gas kiln territory.
A glaze firing usually takes 8–12 hours up and a similar time cooling. Don’t open the kiln until it’s below roughly 200°F (93°C). The wait is the hardest part, but cracking the lid on a hot load can thermal-shock your pots and craze the glaze.
Glazing Pottery at Home Without a Kiln
If you don’t own a kiln, you have three realistic options. First, use a community kiln: many pottery studios and ceramic supply shops fire customer work for a few dollars per piece or by the shelf. Second, buy a small tabletop or 120V hobby kiln, which can handle low-fire and some mid-fire work on a standard household circuit.
Third, accept a non-fired finish. True glaze requires kiln temperatures, but acrylic sealers, paints, and varnishes can give decorative (not food-safe) pieces a glossy look. I go through the workarounds and their limits in can you glaze pottery without a kiln.
Testing Glazes Before Committing
Test your glazes before applying them to your final pieces. Make small test tiles from the same clay body, apply the glaze at 1, 2, and 3 coats, and fire them with the same schedule you plan to use. Test tiles show you the real fired color, texture, and how the glaze behaves at different thicknesses. Jar color and fired color are often wildly different.
Preventing Common Glaze Defects
- Pinholes: tiny craters from escaping gases. Bisque fire hot enough, apply thinner coats, and slow the end of the glaze firing.
- Crazing: a web of fine surface cracks caused by poor glaze fit between glaze and clay. Switch glazes, switch clay, or adjust the firing.
- Crawling: glaze pulling back into bare patches. Almost always dust, oil, or glaze applied too thick; clean your bisque and thin your coats.
- Running: glaze pooling at the foot or dripping onto the shelf. Overfired or over-applied; keep the bottom third of vertical pieces lighter-coated.
A flawed piece often isn’t a lost cause. Many pots can be touched up and fired again, which I cover in can you reglaze pottery.
Keep Records
Write down the glaze, number of coats, clay body, and firing cone for every batch, and photograph the results. Six months later you will not remember which combination produced that one perfect blue, and notes are the only reliable way to repeat a success or avoid repeating a failure.
FAQ Section
These are the questions I hear most often about glazing at home:
How do you glaze ceramics at home without a kiln?
You can’t produce true fired glaze without kiln temperatures. Your options are paying a local studio to fire your glazed pieces (usually a few dollars per pot), buying a small hobby kiln, or using non-fired finishes like acrylic sealer for purely decorative pieces.
Can I use store-bought glazes, or must I make my own?
Both work. Store-bought brushing glazes are the easiest route at home: pre-mixed, with a wide color range and a fired sample on the jar. Homemade glazes are cheaper in volume and fully customizable, but you’ll need raw materials and some glaze chemistry knowledge.
How many coats of glaze should I apply?
For brushing glazes, 2–3 coats is the norm, but check the jar; some specialty glazes want only one. Let each coat lose its wet shine before adding the next. For dipping, a single 3-second dip is usually enough.
How do I know if a glaze is food safe?
Use a glaze labeled food safe and lead-free, fire it to its full rated cone, and apply it over the entire food-contact surface. If you mix your own glaze, have pieces lab-tested for leaching or stick to reputable, tested food-safe recipes.
Why is my glaze not adhering to the pottery?
The usual culprits are dusty bisqueware, oils from handling, a piece that’s still damp from sponging, or glaze that has settled in the jar. Clean the bisque, let it dry after wiping, and stir the glaze thoroughly before every application.
How can I prevent glaze from sticking to the kiln shelves?
Keep glaze off the bottom of your pots (wax the foot or sponge it clean) and fire on kiln-washed shelves. Stilts or small clay “cookies” under each piece add insurance, especially with runny glazes.