How To Fix Cracks in Fired Pottery
By Linda · · 9 min read
To fix cracks in fired pottery: 1) clean the cracked area with soap and water and let it dry completely, 2) mix a two-part ceramic epoxy according to the manufacturer’s instructions, 3) work the epoxy into the crack with a toothpick or small spatula, 4) press the crack closed and secure it with tape or rubber bands until the adhesive sets (usually 5 minutes to an hour), 5) scrape away excess before it fully hardens, and 6) let the repair cure for 24–72 hours.
Be honest with yourself about what a repair can do. A glued crack restores the look of the piece, not its original strength. Most repaired pottery is no longer food-safe or suitable for heat, either.
Types of Cracks in Pottery
Before you reach for the epoxy, it helps to know what kind of crack you’re dealing with. The type tells you what caused it, and whether a repair is even worth attempting.
| Crack type | What it looks like | When it forms | Common cause |
|---|---|---|---|
| S-crack | S-shaped crack in the bottom of a thrown pot | Drying or bisque firing | Poorly compressed base, water pooled inside during throwing |
| Drying crack | Jagged crack, often at rims, handles, or joins | Before firing, shows up after | Uneven or too-fast drying, attachments drier than the body |
| Firing crack | Clean split with slightly rounded (glazed-over) edges | During the firing | Moisture left in the clay, firing too fast through quartz inversion |
| Dunting (cooling crack) | Sharp, clean crack with razor edges, often running through the whole piece | During cooling, or days later | Cooling too fast through 1063°F (573°C), opening the kiln too early |
| Hairline crack | Fine line, may only show when the piece is wet or rings dull when tapped | Any stage | Thermal stress, a flaw that propagated over time |
| Crazing | Network of fine lines in the glaze only, body intact | After glaze firing, sometimes months later | Glaze shrinks more than the clay body (a fit problem, not a structural crack) |
A few useful distinctions from my own kiln-opening disappointments:
- Cracks with smooth, glazed edges happened before or during the glaze firing, since the glaze had time to melt over them. Sharp, clean edges mean the crack happened during cooling or after the piece came out.
- Crazing isn’t a crack in the pot. It’s the glaze layer crackling because it doesn’t fit the clay body. The pot is structurally fine, though crazed surfaces can harbor bacteria on functional ware.
- An S-crack in the base can’t really be “fixed.” It’s a making flaw. Fill it for display, but the pot will never reliably hold water.
If your pieces crack repeatedly, the problem is upstream of the repair. I cover the root causes in detail in why does my pottery crack.
Can You Fix a Crack by Refiring?
Mostly, no — and this surprises a lot of people. Refiring a cracked piece usually makes the crack worse, because the crack opens further as the piece expands and contracts through the firing cycle.
There are partial exceptions. A very fine hairline in bisqueware can sometimes be filled with a paste of the same clay mixed with vinegar or paper clay slip, then refired. Results are hit-or-miss. Commercial bisque-fix products exist for this too. But a crack in fully glaze-fired pottery is a cold-repair job, full stop. If you’re curious about what refiring can and can’t do, see can you fire pottery twice.
Never put an epoxy-repaired piece back in the kiln. Epoxy burns out at a few hundred degrees, releases fumes, and leaves you with a re-broken pot.
Choosing the Right Adhesive
The adhesive matters more than any other step. Here’s how the common options compare:
| Adhesive | Best for | Cure time | Drawbacks |
|---|---|---|---|
| Two-part epoxy (clear) | Structural cracks, load-bearing repairs | Sets in 5–60 min, full cure 24–72 hrs | Can yellow over time; visible glue line if over-applied |
| Epoxy putty | Filling gaps and missing chips | Workable for ~1 hr, cures in 24 hrs | Opaque; needs painting to blend in |
| Cyanoacrylate (super glue) | Quick tacking of tiny hairlines | Seconds to minutes | Brittle, weak on porous ceramic, poor water resistance |
| Kintsugi lacquer/epoxy kits | Decorative repairs you want to celebrate | Days to weeks (traditional urushi) | Costly; traditional urushi lacquer can irritate skin |
For most repairs I recommend a clear two-part epoxy rated for ceramics. Expect to spend roughly $5–15 for a tube set at any hardware store; specialty ceramic-conservation epoxies run higher. Skip plain white craft glue entirely. It’s water-soluble and has no business near pottery.
Preparing the Cracked Pottery
Adhesive only bonds to clean ceramic. Wash the cracked area with mild dish soap and warm water, scrub gently inside the crack with an old toothbrush, then rinse well.
Let the piece dry completely, at least 24 hours for porous earthenware, which soaks up water like a sponge. Wiping the crack edges with rubbing alcohol just before gluing removes any last oils from your fingers.
If the crack has old glue in it from a previous repair attempt, soften it with acetone and pick it out first. Epoxy over old glue fails.
Repairing the Crack Step by Step
Apply the Epoxy
Mix only what you need. A pea-sized amount goes a long way. Work it into the crack with a toothpick, fine spatula, or small brush, making sure it penetrates the full depth rather than just sitting on the surface.
Less is more. Excess epoxy squeezes out and leaves a visible ridge that’s tedious to remove once hard.
Align and Secure
Press the crack closed and check the alignment by running a fingernail across the line. You should barely feel it. Hold the piece together with painter’s tape, rubber bands, or spring clamps with padded jaws.
A sandbox trick from ceramic restorers: nestle the piece in a tub of sand or rice so gravity holds the crack closed while it cures. It beats holding a bowl for an hour.
Remove the Excess
Once the epoxy is firm but not rock-hard (check the package timing, often 1–2 hours in), shave off any squeeze-out with a razor blade held flat to the surface, or wipe with a cotton swab dipped in rubbing alcohol. Waiting until full cure means scraping and sanding instead.
Cure and Finish
Leave the piece undisturbed for the full cure time, usually 24 hours minimum and 72 for maximum strength. After curing you can paint over the repair line with ceramic or acrylic paints to blend it in; if you want options for disguising or refinishing the surface, my guide on can you paint over glazed pottery covers what sticks and what doesn’t.
Fixing Hairline Cracks
Hairlines are awkward because there’s no gap to fill. Two approaches work:
- Thin epoxy wicking. Warm the piece gently (a sunny windowsill, not an oven), then run low-viscosity epoxy along the line. The warmth thins the epoxy and capillary action pulls it into the crack. Wipe the surface clean before it sets.
- Stop-drilling for spreading cracks. Restorers sometimes drill a tiny hole at the very end of a crack with a diamond bit to stop it traveling further. For a treasured piece, that’s a job for a professional.
Tap test before and after: a sound pot rings when flicked with a fingernail; a cracked one thuds. If it still thuds after repair, the crack runs deeper than the epoxy reached.
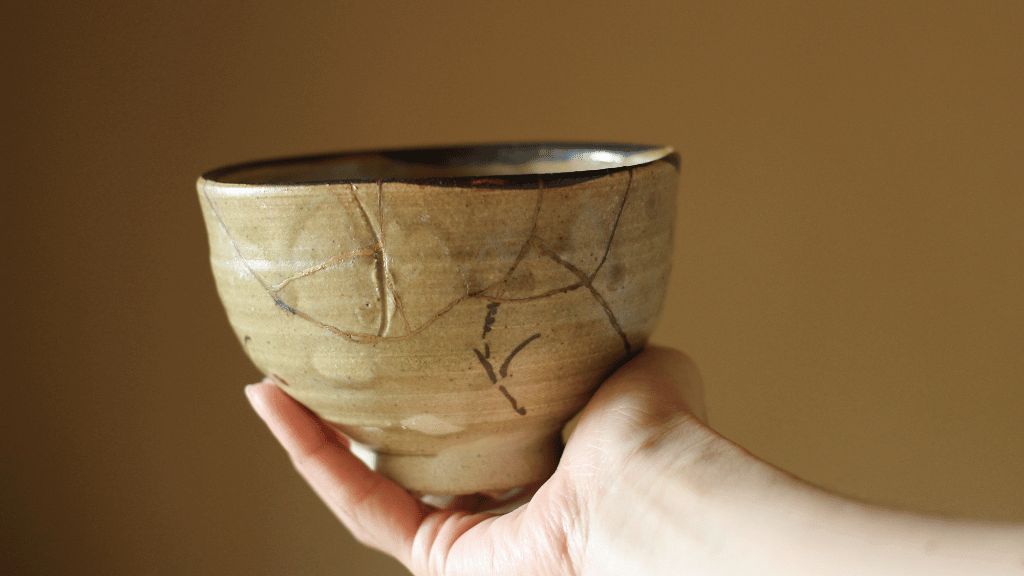
Kintsugi: Making the Crack the Feature
Kintsugi is the Japanese art of repairing pottery with lacquer dusted in gold, treating the break as part of the object’s history rather than something to hide. Modern kits substitute epoxy mixed with gold mica powder, which is far cheaper than traditional urushi lacquer and easier on your skin.
A starter kintsugi kit typically costs $20–50, and the technique works on cracks as well as full breaks. If the piece is already in pieces rather than just cracked, start with my guide on how to fix broken pottery.
Limitations of Repaired Pottery
Know what you’re getting before you put a repaired piece back into service:
- Strength. A good epoxy joint is strong, but the piece will never match its original fired strength. Handle it as a fragile item.
- Food safety. Most epoxies are not certified food-safe, and the crack itself can harbor bacteria. Keep repaired ware decorative. If you’re unsure about a specific piece, here’s how to tell if pottery is food safe.
- Heat. Epoxy softens well below cooking temperatures. No oven, no microwave, no dishwasher. Hand-wash only, and even then, briefly.
- Water. A filled crack is rarely truly watertight. For a repaired vase, use a glass or plastic liner inside rather than trusting the seal.
Preventing Cracks in the First Place
Every crack I’ve ever repaired taught me the same lesson: prevention is cheaper.
- Wedge thoroughly and compress your bases. Air pockets and loose bottoms cause S-cracks and blowouts.
- Dry slowly and evenly. Cover work loosely with plastic, dry handles and rims at the same rate as the body, and never rush a thick piece. Bone-dry is the goal before firing; see can pottery be too dry to fire for why that worry is backwards.
- Fire and cool at sensible speeds. Go slow through 212°F (100°C) to drive off remaining water, and through quartz inversion at 1063°F (573°C) in both directions. Don’t crack the kiln lid until it’s below about 200°F (93°C).
- Match clay, glaze, and temperature. A cone 6 clay fired with an incompatible glaze invites crazing and dunting. If you’re unsure what your clay needs, start with how hot does a kiln need to be for pottery.
FAQ: Fixing Cracks in Fired Pottery
What are the main types of cracks in pottery?
The big six: S-cracks (in the base of thrown pots), drying cracks (rims, handles, joins), firing cracks (glazed-over edges), dunting or cooling cracks (sharp clean edges from cooling too fast), hairline cracks, and crazing, which is a glaze-fit issue rather than a structural crack.
Can repaired pottery be used for food or cooking?
No. Epoxy adhesives are generally not food-safe, can’t take cooking heat, and the repaired crack can trap bacteria. Keep repaired pieces for display, dry goods, or use with a liner.
Can you fix cracked pottery by refiring it?
Almost never. Cracks typically open wider during refiring. Hairlines in bisqueware can occasionally be patched with clay paste or a commercial bisque-fix product before refiring, but glaze-fired cracks need a cold repair with epoxy. And never refire anything that already has glue on it.
How long does ceramic epoxy take to cure?
Most two-part epoxies set in 5–60 minutes and reach full strength in 24–72 hours. Don’t stress the repair (and don’t wash the piece) until the full cure time has passed.
Can I paint over an epoxy repair?
Yes, once the epoxy is fully cured. Acrylic or cold ceramic paints work well for blending the repair line into the surrounding glaze; seal with a clear acrylic varnish for durability. The paint is decorative only. It doesn’t restore food safety.
Is it possible to fix pottery cracks without epoxy?
Yes. Kintsugi repairs use lacquer (or epoxy substitutes) dusted with gold to highlight the crack rather than hide it. And if a structural repair isn’t worth it, repurpose the piece. A cracked bowl makes a fine planter, and broken bits become mosaic material. I’ve collected more ideas in what to do with broken pottery.