How To Glue Pottery Back Together
By Linda · · 9 min read
To glue pottery back together, clean the broken edges with rubbing alcohol, apply a thin layer of two-part epoxy to one edge, press the pieces together, and hold them in place with masking tape or rubber bands while the adhesive sets.
Let the epoxy cure fully before handling the piece. That usually means 24 hours, even for “5-minute” formulas. Then scrape or sand away any squeeze-out with a razor blade or fine-grit sandpaper.
That’s the short version. Below I’ll walk through the full process, the glues that hold up on ceramic and porcelain, and the mistakes that turn a clean break into a permanently crooked repair.
Can You Glue Ceramic Back Together?
Yes. A clean break, meaning two or three pieces with edges that fit snugly, is one of the easiest ceramic repairs there is. A careful job with epoxy can be nearly invisible.
What you can’t do is restore the piece to its original strength or make it kiln-safe again. Glued pottery is for display and light use, not the dishwasher, microwave, or oven. If you want the longer answer on what’s realistic, I cover it in Can Broken Pottery Be Glued?
The harder the break is to repair, the more this matters:
- Clean break, 2–4 pieces – very fixable at home.
- Shattered into many shards – fixable, but slow; you glue one joint at a time.
- Crushed or powdered areas – missing material has to be filled with epoxy putty, which is a restoration job, not a gluing job.
The Best Glue for Ceramic and Pottery
The best way to glue ceramic back together is with a two-part epoxy. It fills tiny gaps, bonds to glazed and unglazed surfaces, dries hard rather than brittle, and gives you a minute or two to adjust alignment before it grabs.
| Adhesive | Bond strength | Working time | Best for | Watch out for |
|---|---|---|---|---|
| Two-part epoxy | Excellent | 5–90 min depending on formula | Most pottery and ceramic repairs | Yellows over time on bright white pieces unless labeled non-yellowing |
| Super glue (cyanoacrylate) | Good but brittle | Seconds | Tiny chips, quick tack on small figurines | No repositioning time; brittle joint can re-crack |
| PVA / white craft glue | Weak on ceramic | Long | Nothing structural; skip it | Water-soluble; fails with humidity |
| Polyurethane (original Gorilla Glue) | Strong but messy | 10–20 min | Not recommended for visible repairs | Foams as it cures and pushes joints apart |
| Specialty “china and glass” cement | Good | Varies | Porcelain and fine china | Slower cure; read the food-safety fine print |
A few buying notes:
- Choose a clear or translucent epoxy for visible repairs. Some restorers tint epoxy with a touch of white pigment to match porcelain.
- A slow-set epoxy (30–90 minute) gives a stronger, less brittle bond than 5-minute epoxy and far more time to get alignment right. I use slow-set for anything I care about.
- You won’t spend much. A tube of decent two-part epoxy runs about $5 to $15 and will handle many repairs.
Polyurethane glues deserve a special warning because they expand as they cure and will shove your carefully aligned pieces out of place. I’ve written more about that in Can You Use Gorilla Glue On Pottery?
What You’ll Need
- Two-part epoxy (or china cement for fine porcelain)
- Rubbing alcohol and cotton swabs
- Toothpicks or a scrap of cardboard for mixing and applying
- Masking tape, painter’s tape, or rubber bands
- A box of sand or rice (to hold odd-shaped pieces upright while curing)
- Razor blade and fine-grit sandpaper (400+ grit) for cleanup
- Nitrile gloves (epoxy is a skin irritant before it cures)
How to Glue Pottery Back Together, Step by Step
Step 1: Dry-fit the pieces first
Before any glue comes out, assemble the broken pieces dry and figure out the order. On a multi-piece break, gluing in the wrong order can lock you out, leaving a shard that no longer fits because its neighbors went on first. Number the pieces with bits of masking tape if it helps.
Step 2: Clean the broken edges
Wipe every broken edge with rubbing alcohol on a cotton swab to remove dust, oils, and old adhesive. Let the edges dry completely. If the piece has been repaired before, the old glue must come off first. Soak the joint in hot soapy water or acetone until it releases. A genuinely clean piece of pottery bonds far better than a dusty one.
Don’t touch the broken edges with bare fingers after cleaning; skin oils weaken the bond.
Step 3: Mix and apply the epoxy
Mix equal parts resin and hardener on scrap cardboard until the color is uniform, about 30 seconds of stirring. Apply a thin layer to one edge only, using a toothpick. Thin is the whole game. Excess epoxy squeezes out, holds the pieces fractionally apart, and leaves a visible glue line.
Step 4: Join and align the pieces
Press the pieces together and rock them very slightly until you feel the break “seat.” Broken ceramic edges key into each other like puzzle pieces, and you can feel when they lock. Run a fingernail across the joint; if it catches, the alignment is off. Fix it now, because in ten minutes you won’t be able to.
Step 5: Tape and support while it cures
Stretch masking tape across the joint in several directions to apply even pressure. For bowls and mugs, rubber bands around the body work well. Nest odd-shaped pieces in a box of sand or rice so gravity holds the joint closed.
Leave it alone for the full cure, typically 24 hours for epoxy at room temperature and longer in a cold room. The glue may feel hard in an hour. It isn’t at full strength.
Step 6: Clean up the joint
Slice off cured squeeze-out with a razor blade held flat against the glaze, then smooth with 400-grit or finer sandpaper. Work gently. Aggressive sanding scratches glaze. If the glue line still shows, a fine artist’s brush and a little acrylic paint matched to the glaze can disguise it on display pieces.
Gluing Porcelain Back Together
Porcelain follows the same steps, but it’s less forgiving. The walls are thin, the breaks are often sharp and glassy, and white porcelain shows every flaw.
- Use a non-yellowing, clear epoxy or a dedicated china-and-glass cement. Standard hardware-store epoxy often has an amber tint that screams “repair” against white porcelain.
- Apply even less adhesive than you would on stoneware. Thin porcelain edges have very little surface area, so squeeze-out is proportionally worse.
- Support is everything. Thin porcelain pieces shift under tape tension, so check alignment twice after taping.
- For valuable or antique porcelain, stop and get a quote from a professional restorer before touching it. A museum-quality repair can run from roughly $50 into the hundreds depending on the piece, and a bad home repair lowers the value more than the break did. If you’re not sure what you have, start with how to tell if pottery is antique.
Earthenware and terracotta sit at the other extreme: the clay is porous and absorbs adhesive, so apply a thin priming layer of epoxy, let it tack up for a minute, then add a second thin layer before joining.
Repairing Multi-Piece and Complex Breaks
When a piece shatters rather than snaps, slow down:
- Glue one joint at a time and let each cure before adding the next shard. Rushing multiple joints at once guarantees misalignment somewhere.
- Build from the base up in most cases, so finished sections sit stable while you work.
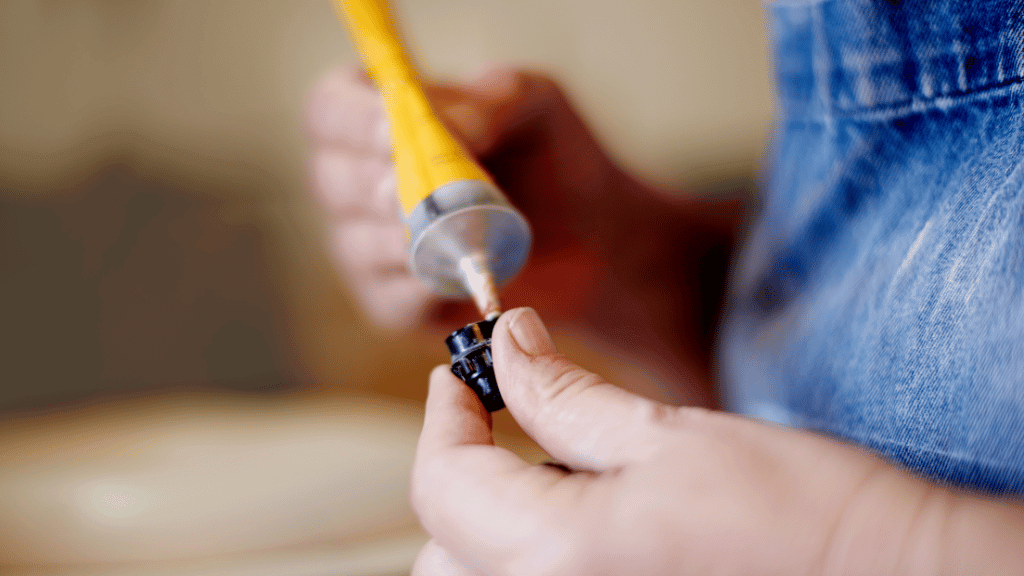
- Use a syringe or fine needle applicator for hairline cracks and tiny shards. It puts adhesive exactly where you need it.
- Dry-fit after every joint. A misalignment of half a millimeter on joint one becomes two millimeters by joint four.
If pieces are missing entirely, two-part epoxy putty can be shaped to fill gaps, sanded smooth after curing, and painted to match. That crosses from gluing into restoration. My post on how to fix broken pottery covers fills, staple repairs, and kintsugi-style gold joins.
And if the piece honestly isn’t worth the hours, broken pottery makes good mosaic material, plant drainage shards, and garden markers. I’ve collected ideas in What To Do With Broken Pottery?
Is Glued Pottery Food-Safe and Watertight?
Treat every glued repair as decorative unless the adhesive manufacturer states otherwise.
- Food contact: most epoxies are not certified food-safe, even after curing. A glued mug or bowl should hold dry items or sit on a shelf, not serve coffee. Some specialty adhesives are labeled food-safe when fully cured. Check the actual datasheet, not the front of the package.
- Water: a well-glued joint often holds water, but test over a sink and don’t trust it long-term. Water slowly works into microscopic gaps.
- Heat: no glued repair survives the dishwasher, microwave, or oven reliably. Epoxy softens with heat, and repeated thermal cycling pops joints (the same expansion-and-contraction stress that cracks pottery in the first place).
One myth worth killing: you cannot re-fire glued pottery to “heal” it. Adhesives burn off long before kiln temperatures. A glaze firing runs around cone 6, roughly 2,232°F (1,222°C), and the piece will simply fall apart in the kiln.
Tips for a Strong, Nearly Invisible Repair
- Less glue, not more. The thinnest layer that wets both edges gives the tightest, least visible joint.
- Get alignment perfect before the glue grabs — fingernail-test the seam.
- Work at room temperature; epoxy cures poorly below about 60°F (16°C).
- Wipe wet squeeze-out immediately with a swab dampened in rubbing alcohol instead of waiting to sand it.
- Don’t rush the cure. Twenty-four hours minimum before the piece bears any load.
FAQ
Can you glue ceramic back together?
Yes. Clean breaks in ceramic glue back together very well with two-part epoxy. The repair can look nearly invisible, but the piece won’t regain full strength and shouldn’t go in the dishwasher, microwave, or oven afterward.
What is the best way to glue ceramic back together?
Clean the edges with rubbing alcohol, apply a thin coat of slow-set two-part epoxy to one edge, press the pieces together until the break seats, tape firmly, and let it cure 24 hours. Slow-set epoxy beats 5-minute epoxy for both strength and alignment time.
How do you glue porcelain back together?
Use the same epoxy method, but choose a clear, non-yellowing formula and apply it sparingly; thin porcelain edges show every bit of excess. For antique or valuable porcelain, get a professional restorer’s opinion before attempting a home repair.
Can I use super glue instead of epoxy?
Super glue works for small chips and quick fixes, but it cures brittle and gives you zero repositioning time. For anything structural or anything you care about, epoxy makes a stronger, longer-lasting joint.
How long should glued pottery cure before I use it?
Give epoxy a full 24 hours at room temperature, even if the label promises a faster set. The glue reaches handling strength quickly but full bond strength slowly.
Is glued pottery food-safe?
Usually not. Most epoxies aren’t certified for food contact even when fully cured. Unless your adhesive’s datasheet explicitly says food-safe after curing, keep glued pieces decorative or limit them to dry goods.